Pure serendipity broke all over your dynamic gaming duo, as I ‘nearly finished’ my British 17th/21st Lancers, Death or Glory Boys, also known simply as 'The Deaths'. It was time for a showdown!
Bill and I decided on the “Hold the line” scenario, and he chose to defend. With his 1500 points of Confident Veteran infantry against my 1865 points of Confidant Trained tanks and infantry, it was looking like it might shape up into quite a rumble.
Beware of the ides of… April?
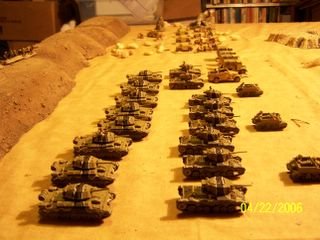
I lined up all my forces on one short end of the table – it is an awesome sight to behold!

The 25lb guns of the Royal Horse Artillery (arty) Regiment prepare for a fire mission.


The iron steeds of the ‘Deaths’ are on line awaiting the signal from their company commander. Eight Valentine IIIs supported by a pair of Crusader II Close Support (CS) tanks, and six Crusader IIIs with their ‘so-so’ 6lb guns make up the armoured company. In the lead is the scout platoon of three Bren carriers. These little doodads cost very few points, move a wholloping 16” each turn. In addition, they get the movement in advance of the game called the “Recon move’; This rule allows me to move them 16” (over roads or regular terrain) before the game begins! Then on the first turn, they move again, along with any other platoon I care to move!


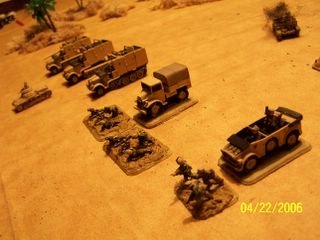
The infantry in their trucks, with the Royal Horse Arty spotters in their White Scout Car. One Bren Carrier of the Scouts can be seen on the right of the spotters. Ahead is some scrub brush that will provide concealing terrain. Will there be an ambush in it?

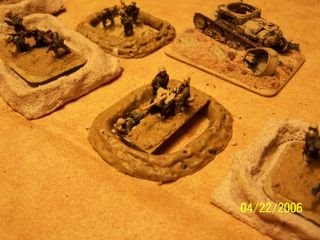
Bill dug in two platoons of Afrika Korp Panzergrenadiers and their company commander, and held his Pak-38 Long 50mm Anti-Tank guns in ambush. They fire 3 rounds each per turn – that can devastate a tank company in short order!

The near objective on my right flank, where my tanks would head first was guarded by a platoon of Panzergrenadiers, with a Kampfgruppe of the company 2IC and a pair of Anti-Tank rifle sections. This was not going to be easy. Digging out dug in infantry is tough, and backed up with defensive fire with an anti-tank rating of 7 would probably cost me some armour!


The second platoon of Panzergrenadiers are dug in on the furthest objective. Their company commander stands with them, stiffening their resolve.

In reserve, Bill was holding a short squad of heavy machine guns, three Dianas, and five Panzer IIIs with the long 50mm. again, a devastating rate of fire (RoF) of 3 when they appear. This could turn ugly right quick!

Bwana Bills reserves and his ambush platoon. He has done a fantastic job painting them.

In wargaming, there is a tenet, a truth that can never be denied. The newest model on the table will die first. In our case, we both have brand new armies we have just finished painting up to our rather critical standards – and we aren’t done yet – and they have not been played yet. The question then is, whose shiny new toys will be the first to die?

The recon platoon blew through the ‘scrub’ area before the game started, clearing it of any possibility of an ambush. The rest of the amour follows closely.

As the attacker, I moved my forces first, though I rolled for Aircraft support first – and failed to roll the required ‘5’. The Scrub area that was cleared by my recon was a perfect hiding place for my low-slung Crusaders. They could see, but couldn’t be seen well. As the Recon approached the first objective and opened fire with all machine guns, the tanks that could see the objective also opened fire, pinning the poor Panzergrenadiers.

The Recon section prepares to assault. The Bren carriers are designed to scout, not fight.

The Recon moved up to assault the infantry. The Panzergrenadiers opened fire with the 2.8cm anti-tank (A/T) rifles and the A/T rifle section. In addition, an MG section opened up on them. After bailing one of the lightly armored scout vehicles, more hits piled on, killing it. After the assault was over, there was still a viable Panzergrenadier force remaining near the objective, however, the brave (but foolish!) scouts had thrown the grenadiers off. The objective was still contested at this point.

One of the scouts is bailed by defensive fire, though they have managed to kill one stand of infantry. The bailed track would die quickly.

As Bwana Bills turn started, he rolled for reserves – and failed to roll a ‘5’. Next turn he would still need a ‘5’, but would get two die. He decided that now was the time to spring his ambush. He needed to kill off those pesky Bren carriers to clear the objective. He decided to fire his infantry platoons A/T rifles, fire the A/T guns of the Pak-38 platoon, and then his remaining infantry would assault. One of the Pak-38s fired at the approaching tanks, killing one Crusader. The Pak-38 A/T guns that fired at the tracks missed, the A/T rifles scored one hit, but achieved nothing, so Bill decided on a desperate gamble and assaulted the scouts. Defensive fire failed to hold the grenadiers back, and they assaulted. Between their firing and their determined assault, the last of the scout platoon sat under a pall of smoke.

The Pak-38 platoon springs their ambush and aids the Panzergrenadiers in finishing off the foolhardy scout platoon.

I rolled for Air again on my turn – and failed. I never realized how hard it is to roll a five! Having noted the threat from the Anti-tank guns, I decided to let fly on them with everything that was in range. This meant I would have to split my assault force to insure their destruction. I moved six Valentine IIIs up, getting three of them in range. With the sort of tanks I’m running in this unit, I maintain my RoF of two even though I moved. Still, I couldn’t expect too much from a 2bl gun, since his A/T guns were dug in. I fired all the Valentines, hitting with four shots, however failed to kill anything. I decided to fire my Crusader II CS as artillery. I managed to range in on the first roll, and place a template on the three guns. Again I failed to kill any, however, the guns were pinned by arty fire and their RoF would drop to one. Instead of nine shots next turn, they would only get three. That would be a big help. Since my spotter had moved, he couldn’t spot for the Royal Horse arty. The gun crews were brewing up a pot of tea and enjoying a task-free day soaking up the sun. On the objective, the Crusaders charged ahead and opened fire, killing the remaining infantry on the objective – however, the 2IC and his nasty little A/T rifle sections were still fighting and holding the objective!

The Pak-38s, pinned after being pummeled by Crusader IICS fire.

Bill began his turn by rolling for reserves. There was a bit of desperation at this point, seeing that horde of tanks so near the objective, not to mention his A/T guns were now the only thing on the table that could really stop the ‘Deaths’ from rolling over both objectives with minimal casualties. He picked up two die and hurled them – and rolled snake-eyes. No reserves this turn. Bill mentioned that in the desert battles, it had usually been the Brits wondering where their tanks were, as enemy tanks hammered the ‘crunchies’ (infantry). Still, he had to make do with what he had. His A/T guns were pinned and couldn’t do much – still three shots is betting than nothing! He opened fire on my approaching tanks, selecting a trio of Crusaders that I had foolishly left in range. He managed to kill one with the Pak-38s. The 2IC and his attached A/T rifle sections moved back towards the objective, to ensure that it was contested.
Once again as my turn began, I rolled for air support, but rolled under a five. That’s a 100 points sitting on the airstrip, doing my army no good. Still, with Bwana Bill rolling the way I normally roll, things are looking pretty good for me right now. Air would just be overkill. I moved all my Valentines (except the HQ!) up into range of the A/T guns. I moved the Crusaders up to take the near objective and finish off that brave, stubborn 2IC and his foul A/T rifle sections. I also decided that now was a good time to bail my infantry out of their trucks and start them walking. The Royal Horse arty spotters jumped out and set up, preparing to finally get to work.

The infantry bails out early and begins the long walk to the second objective.

I fired all guns from the Valentines at the Pak-38s. I also ranged in with arty and the CS tanks as arty – killing a gun and a vehicle, and pinning them again. The Crusaders passed the objective and opened fire on the Panzergrenadier 2IC and A/T rifles. They managed to kill off the A/T rifles, and the 2IC held fast... for a moment.

The Crusaders prepare to finish off the 2IC and his A/T rifles.

The Crusaders then assault the poor 2IC, who is now all alone, and they finish him off. Things are looking grim indeed for Bwana Bill and his DAK.
Bill rolls his dice for reserves – and gets one platoon!!! He brings on his Panzer IIIs to support the failing left flank (the near objective, where my Crusaders are located). He opens fire and kills two Crusaders! It’s something, but still doesn’t look like it will be enough.
I roll for air support – and get it! I charge my surviving Crusaders right into the middle of his Panzer IIIs – Tally ho lads! I bring up the Valentines so that some of them are in range of the Panzers. Though it’s unlikely the 2lb gun will do any harm, it can’t hurt to try. I fire the Crusaders at the side armour of the Panzer platoon, killing two. The Valentines open up as well, surprisingly killing one tank! While I was very pleased for my little Valentines at this amazing result, I knew this was a serious blow to Bill. The Panzer platoon would have to test for Morale. They failed and left the table leaving Bill in a very tight spot.

Panzers smoke in the distance. In the upper right of the photo, a burning Crusader III can be seen as well.

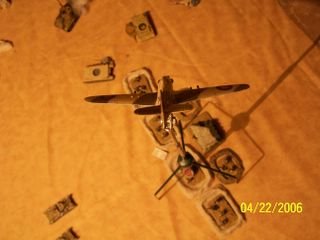
I call in the air – three planes – and bomb the infantry on the second objective. After three passes the little Hawker Hurricane IIC kills the platoon commander as well as the company commander. This is the nail in the coffin. In addition, the arty opens fire on the Panzergrenadiers, pinning them.

The Hurricane IIC rolls off the target after releasing bombs.

Bill rolls for reserves. This roll is so very crucial. He picks up a handful of dice – and doesn’t roll a single ‘5’ or better! GAH! The frustration is intense – for both of us. Unfortunately, this means that he has only one platoon on the table, and no company commander. He is under 50% strength and can't check for morale. The game ends with Bills shiny toys being the ones to take the hammering. He asked for a rematch; so keep your eyes peeled for that post to come!

The platoons that didn't show up. These platoons sitting in reserve, not appearing on the table may have cost Bwana Bill and his DAK the game - three Dianas with their powerful guns, and the HMG section. While the HMG teams may not have hurt my amour, those Dianas would have put a serious hurt on the 'Deaths'.

No comments:
Post a Comment