I've said it before, and for any new folks, I'll say it again - I am not much on strategy or tactics. Unfortunately, though we love Flames of War (FoW), we don't get to play very often. If I recall correctly, within our little group, Consul Scipio and I were the last to play, and most recently - and that was in a tournament at Fall In. (Fall In, by the way, was an awesome convention, lots of fun, good friends, surprisingly good food, and more games than you can shake a bag of die at!) I believe my last game, prior to the tournament, was nearly two years ago. Yup. Been a day or three!
With that in mind, and given the fact that real life and online game addictions keep me focused on things not on the tabletop, I have trouble remembering the basic rules - forget about all the special rules, scenarios, and scenario special rules!
Our friends down under at Battlefront (New Zealand, not Oz!) have released a compendium of special rules for each army in the mid to late war range, called "Das Book". Included in this small tome are all the charts for the arms and equipment of each army, as well as all the missions and mission special rules!
One thing that I have not tried yet is the "Total War" rules. These are games from 3000 points and up! Amazing!!! I can see dozens of tanks and hundreds of infantry moving across a table, ready to smash into their opponents!
I call "Das Book" a bargain at $10.00 (U.S.)!
Once, long ago, an old soldier told me that "plagiarism is the highest form of a compliment" - or something to that effect. Therefore, I present to you, directly from the FoW Web site - copied from the back cover of "Das Book" - an overview by the lads in New Zealand! If you want to read it and get a view of the book and all the great charts, you can go here.
Oh! And please tell me I'm not the only one that doesn't get the "Das Boot" reference? ;)
"Das Book is the Flames of War field manual for the consummate WWII general. With all the tools and tactics you need to play a one on one engagement with a friend or enter the tournament arena and destroy your opponent’s forces. Know your enemies strengths and weaknesses, understand the missions and objectives, learn how to use the terrain and fortifications of the battlefield to your armies best advantage.
Compiled from across the Flames Of War book range, Das Book includes:
- Nine Combat Missions: Free-For-All, Encounter, No Retreat, Fighting Withdrawal, Breakthrough, The Cauldron, Roadblock, Hasty Assault, and Breakout.
- All mission special rules.
- Late-war Airborne Assault Special Rules and Mission.
- Amphibious Assault Rules and Mission.
- Bocage Rules.
- River Crossing Rules and Mission.
- Fortification Rules, with updated bunker rules and two Fortification missions, Trench Fight and The Big Push.
- Street Fighting Rules and Mission.
- Complete Mid and Late-war Arsenals for all of the major forces."
So what's the bottom line? In one small book, you have all the information you need, from all of the books - mid-war to late war - to play any era of game you like, save the new early war games! That saves having to tote around 3-5 larger books!
Like I said, at ten bucks "Das Book" is a bargain!
Showing posts with label Flames of War. Show all posts
Showing posts with label Flames of War. Show all posts
Wednesday, November 24, 2010


Saturday, August 28, 2010
Huzzah Hobbies: New Gaming Store In Northern Virginia
For those of you who live in the VA, MD, DC area you might be interested to know that there is a new hobby store in Ashburn, Virginia. It's called Huzzah Hobbies. I have not been up there yet, but from the looks of it they apparently support quite a variety of game systems to include some historical systems such as Flames of War and DBA.
http://www.huzzahhobbies.com/index.cfm
Looks like it will be well worth checking out!
http://www.huzzahhobbies.com/index.cfm
Looks like it will be well worth checking out!
Sunday, May 02, 2010
Warlord Games Bolt Action British Paras
 It's been a long time since the last post on this blog, hasn't it?
I've been quite busy with work, family and painting when I have the chance. I thought I would share an experience today as my son decided he wants some 28mm WWII British Paratroopers. Since he has done very well in school, I thought I would treat him with a few.
Kyle likes "larger" 28mm sizes so we looked online at:
Artizan Miniatures
Bolt Action (Warlord Games)
Renegade Miniatures
All of them looked good, but after closely reviewing them, Kyle preferred the Bolt Action range. I think it helped that almost all of the pictures were of painted miniatures. It appears they were painted by Paul Sawyer too, who is one of the owners of Warlord Games. Very nice paint work too I look forward to Mr. Sawyer posting more pictures of his work.
Also, I recently purchased and started playing the new Flames of War: Market Garden campaign and board game. So far it's been a lot of fun to play. I'll follow up with another post reviewing this game.
Monday, November 30, 2009
The Raid
The fight between the prisoners began innocently enough. A “Tommy” was brewing up a bit of tea for his mates when another group of Tommies, bored with the prison routine decided to get up a football match. Unfortunately, what appeared to be a bad kick, sent the ball squarely into the tea kettle, with predictable results. The two groups clashed, forty or so prisoners, punching, kicking, and shouting epithets, and drawing the attention of the camp guards.
Shouts of “Fermo!” erupted from the Italian guards, as they waded into the unruly mob, rifles swinging.
Long Range Desert Group Leftenant Nigel Smythe-Clyde and Sergeant “Jock” Andrews slipped quickly under the fence and into the desert as the sun began to set, whispering a word of thanks to the lads in the camp for the distraction they had provided. With the light fading and the heat of the day dropping, the two survivors of the ill-fated raid on a Duetche Afrika Korps (DAK) supply dump began the long trek to freedom, hoping to fight again another day.
Smythe-Clyde could not help but relive the moments leading up to their capture, as he and “Jock” moved from cover to cover as best they could in the bleak desert terrain.
The raid began with two teams of LRDG trucks and jeeps, carrying a lone S.A.S. team, surprising the drowsy guards at the DAK supply depot. The initial explosion from the S.A.S. team's demolition charges, or "Lewes Bombs", destroyed a pile of fuel drums, sending flames high into the gloaming sky.
Smythe-Clyde’s team raced past a lone Italian Stuka, hosing it with tracer fire as they went. Their route took them between three tasty targets, and their combined fire destroyed all that they aimed at, sending exploding ordinance arcing into the sky, narrowly missing their vehicles.
With the flames settling down to a steady burn, it was time to leave. Having achieved four of five of their intended objectives, it was time to beat a hasty retreat before the alerted enemy arrived.
The other LRDG team commander swept in and picked up the S.A.S. team and headed for their planned escape route, as the roar of engines and a plume of dust announced the arrival of a group of unhappy DAK soldiers. Watching their precious supplies go up in flames put them in a decidedly foul mood.
The DAK heavy machine gun unit leapt out of their Krupps trucks and set up their weapons, intent on stopping the "Tommies" from escaping. As Smythe-Clyde’s team began turning their vehicles around to make good their escape, the DAK HMG teams opened fire, destroying every truck in Smythe Clyde’s team. Two men ran towards his jeep as he began to accelerate away from the killing zone, he nudged “Jock”, who slewed ‘round, braking and accelerating, then braking again as he neared the survivors. The two troopers jumped on board as “Jock” stood on the gas pedal, pumped the clutch and sent the jeep careening towards the other LRDG team’s location.
As they drove, the soldiers could not take time to reflect on their grievous losses, instead focusing on getting clear of the area, hoping to fade into the desert as dusk approached.
A rumbling in the distance announced the approach of another enemy unit. Drivers pushed their machines to the limits as they negotiated the unfriendly, yet familiar desert terrain.
Ahead of the escaping LRDG, a DAK Panzergrenadier platoon leapt out of their trucks and hustled into position, hoping to block the oncoming juggernaut with a wall of lethal lead.
The LRDG teams approached a route they had reconnoitered earlier around a patch of nearly impassable marsh, filled soft sand, when a sharp-eyed gunner spotted the Panzergrenadiers and opened fire. At nearly the same instance, every gunner on the remaining trucks and jeeps sent a fiery hail of tracer-laden machine gun fire into the scrambling grenadiers. Bullets struck flesh and bone with merciless abandon.
As they eased past the marshy area, they could hear the cries of the wounded and dying. There was no return fire. Smythe-Clyde allowed himself the slightest grin, hoping that this encounter was a portent of their impending escape.
The last gleam of the desert sun disappeared as the survivors pushed past the salt marsh and continued towards a wadi, which they hoped would shield them from enemy eyes and retribution.
As darkness deepened, the teams were forced to slow their vehicles, for fear of becoming stuck or running into an enemy position. Smythe-Clyde and his comrades pushed on, relying on the cover of darkness and what speed they could maintain to cover their escape. He could just make out the entrance to the wadi they sought, slightly illuminated by the rising moon. If only their luck would hold a bit longer! They were in sight of safety!
Suddenly another sound issued from the night. Again, sounds of engines, but this time mixed with the unmistakable sounds of tracks clanking across the desert floor.
Smythe-Clyde took a deep breath and said a quick gallows humor prayer,”For what we are about to receive, we give thee thanks!”
Two SdKfz-231 armored cars appeared like ghosts out of the darkness. They opened fire on the escaping LRDG teams, missing all but one truck. The team from the stricken Chevy leapt to safety, climbing aboard another vehicle.
One of the “acht-rad”, or eight-wheeled armored cars was sitting directly in the entrance of the wadi, nearly blocking the escape route. Engines roared as the commander saw their only hope for escape slipping away. He shouted his command, “Get past ‘em, go, go, go!! Into the wadi, move it!.”
The other armored car was on their right hand side, outside the wadi. If they were quick enough, and lucky with their shots, they might be able to bail the crew of the one armored car out, and dodge the fire of the second by entering the wadi.
Smythe-Clyde ignored the command to enter the wadi, instead ordering “Jock” to slide past the second armored car while it was pre-occupied with the other team.
As he glanced back, he could just make out the flashes of fire from HMGs. He wondered if it were the same lot that had killed most of his team. To their side, he could see sporadic fire, apparently from another panzergrenadier platoon.
The other LRDG team commander and his trucks entered the wadi and raked the side of the armored car, unfortunately to little effect.
Then, with a lurch, Smythe-Clyde’s jeep came to a bone-jarring halt and burst into flames. He and “Jock” were both thrown from the vehicle. In the flames, he could just make out the team he and “Jock” had rescued, apparently dead from machine gun or cannon fire. Smythe-Clyde and “Jock” leaped to their feet and ran onward, hoping to escape in the darkness.
Inside the wadi the other LRDG team’s luck ran out. With their vehicles destroyed by HMG and 20mm cannon fire, three surviving teams attempted to assault the armored car in the wadi. A series of rushes and assaults using sticky-bombs failed to produce results, and the return fire from the armored car killed the remaining men.
The clank of tank treads on desert track grew noticeably louder, and then ominously stopped. “Jock” and Smyth-Clyde looked at each other and slowly stood, throwing their weapons and Arabic headgear to the ground. Ahead of them, five Panzer Mark III “Specials” loomed, all guns trained on the two survivors. Behind them, the turret from the armored car swung around to cover them. A hatch opened in the lead Panzer, and the tank commander climbed out, motioning with a raised MP-40 for the pair to approach.
As they walked cautiously up to the Hauptmann, they heard in surprisingly clear and nearly unaccented English, “Welcome into the “bag” Tommy. Cigarette?”
Shouts of “Fermo!” erupted from the Italian guards, as they waded into the unruly mob, rifles swinging.
Long Range Desert Group Leftenant Nigel Smythe-Clyde and Sergeant “Jock” Andrews slipped quickly under the fence and into the desert as the sun began to set, whispering a word of thanks to the lads in the camp for the distraction they had provided. With the light fading and the heat of the day dropping, the two survivors of the ill-fated raid on a Duetche Afrika Korps (DAK) supply dump began the long trek to freedom, hoping to fight again another day.
Smythe-Clyde could not help but relive the moments leading up to their capture, as he and “Jock” moved from cover to cover as best they could in the bleak desert terrain.
The raid began with two teams of LRDG trucks and jeeps, carrying a lone S.A.S. team, surprising the drowsy guards at the DAK supply depot. The initial explosion from the S.A.S. team's demolition charges, or "Lewes Bombs", destroyed a pile of fuel drums, sending flames high into the gloaming sky.
Smythe-Clyde’s team raced past a lone Italian Stuka, hosing it with tracer fire as they went. Their route took them between three tasty targets, and their combined fire destroyed all that they aimed at, sending exploding ordinance arcing into the sky, narrowly missing their vehicles.
With the flames settling down to a steady burn, it was time to leave. Having achieved four of five of their intended objectives, it was time to beat a hasty retreat before the alerted enemy arrived.
The other LRDG team commander swept in and picked up the S.A.S. team and headed for their planned escape route, as the roar of engines and a plume of dust announced the arrival of a group of unhappy DAK soldiers. Watching their precious supplies go up in flames put them in a decidedly foul mood.
The DAK heavy machine gun unit leapt out of their Krupps trucks and set up their weapons, intent on stopping the "Tommies" from escaping. As Smythe-Clyde’s team began turning their vehicles around to make good their escape, the DAK HMG teams opened fire, destroying every truck in Smythe Clyde’s team. Two men ran towards his jeep as he began to accelerate away from the killing zone, he nudged “Jock”, who slewed ‘round, braking and accelerating, then braking again as he neared the survivors. The two troopers jumped on board as “Jock” stood on the gas pedal, pumped the clutch and sent the jeep careening towards the other LRDG team’s location.
As they drove, the soldiers could not take time to reflect on their grievous losses, instead focusing on getting clear of the area, hoping to fade into the desert as dusk approached.
A rumbling in the distance announced the approach of another enemy unit. Drivers pushed their machines to the limits as they negotiated the unfriendly, yet familiar desert terrain.
Ahead of the escaping LRDG, a DAK Panzergrenadier platoon leapt out of their trucks and hustled into position, hoping to block the oncoming juggernaut with a wall of lethal lead.
The LRDG teams approached a route they had reconnoitered earlier around a patch of nearly impassable marsh, filled soft sand, when a sharp-eyed gunner spotted the Panzergrenadiers and opened fire. At nearly the same instance, every gunner on the remaining trucks and jeeps sent a fiery hail of tracer-laden machine gun fire into the scrambling grenadiers. Bullets struck flesh and bone with merciless abandon.
As they eased past the marshy area, they could hear the cries of the wounded and dying. There was no return fire. Smythe-Clyde allowed himself the slightest grin, hoping that this encounter was a portent of their impending escape.
The last gleam of the desert sun disappeared as the survivors pushed past the salt marsh and continued towards a wadi, which they hoped would shield them from enemy eyes and retribution.
As darkness deepened, the teams were forced to slow their vehicles, for fear of becoming stuck or running into an enemy position. Smythe-Clyde and his comrades pushed on, relying on the cover of darkness and what speed they could maintain to cover their escape. He could just make out the entrance to the wadi they sought, slightly illuminated by the rising moon. If only their luck would hold a bit longer! They were in sight of safety!
Suddenly another sound issued from the night. Again, sounds of engines, but this time mixed with the unmistakable sounds of tracks clanking across the desert floor.
Smythe-Clyde took a deep breath and said a quick gallows humor prayer,”For what we are about to receive, we give thee thanks!”
Two SdKfz-231 armored cars appeared like ghosts out of the darkness. They opened fire on the escaping LRDG teams, missing all but one truck. The team from the stricken Chevy leapt to safety, climbing aboard another vehicle.
One of the “acht-rad”, or eight-wheeled armored cars was sitting directly in the entrance of the wadi, nearly blocking the escape route. Engines roared as the commander saw their only hope for escape slipping away. He shouted his command, “Get past ‘em, go, go, go!! Into the wadi, move it!.”
The other armored car was on their right hand side, outside the wadi. If they were quick enough, and lucky with their shots, they might be able to bail the crew of the one armored car out, and dodge the fire of the second by entering the wadi.
Smythe-Clyde ignored the command to enter the wadi, instead ordering “Jock” to slide past the second armored car while it was pre-occupied with the other team.
As he glanced back, he could just make out the flashes of fire from HMGs. He wondered if it were the same lot that had killed most of his team. To their side, he could see sporadic fire, apparently from another panzergrenadier platoon.
The other LRDG team commander and his trucks entered the wadi and raked the side of the armored car, unfortunately to little effect.
Then, with a lurch, Smythe-Clyde’s jeep came to a bone-jarring halt and burst into flames. He and “Jock” were both thrown from the vehicle. In the flames, he could just make out the team he and “Jock” had rescued, apparently dead from machine gun or cannon fire. Smythe-Clyde and “Jock” leaped to their feet and ran onward, hoping to escape in the darkness.
Inside the wadi the other LRDG team’s luck ran out. With their vehicles destroyed by HMG and 20mm cannon fire, three surviving teams attempted to assault the armored car in the wadi. A series of rushes and assaults using sticky-bombs failed to produce results, and the return fire from the armored car killed the remaining men.
The clank of tank treads on desert track grew noticeably louder, and then ominously stopped. “Jock” and Smyth-Clyde looked at each other and slowly stood, throwing their weapons and Arabic headgear to the ground. Ahead of them, five Panzer Mark III “Specials” loomed, all guns trained on the two survivors. Behind them, the turret from the armored car swung around to cover them. A hatch opened in the lead Panzer, and the tank commander climbed out, motioning with a raised MP-40 for the pair to approach.
As they walked cautiously up to the Hauptmann, they heard in surprisingly clear and nearly unaccented English, “Welcome into the “bag” Tommy. Cigarette?”
Saturday, October 31, 2009
Love and Hate
Grab a wineglass and have a seat, we're about to have some whine!
I love my Battle Front Minis - they are usually very clean, well built, well considered models that go together without TOO much difficulty, and look really nice on the tabletop. The "Six-Pounder Portee" - a mid-war model of a British six pound anti-tank gun mounted on the back of a truck (Portee), is one that I have to say I'm a bit frustrated with.
Imagine the scene: less than a week till Fall In (the HMGS East convention in Gettysburg, PA), five different armies at two different scales scattered across the table in my chaoserrr war room, and I'm painting as fast as I possibly can.
I start the final coat, drybrushing and highlighting on my six pounder portees - and BAM! I drop one.
For starters, this model is a bit tricky to put together. Kudos to Battle Front for putting a "how to put it together" guide on their site for this model.
The problem lies with the ammunition rack on the back of the truck. There are four posts that this box is supposed to sit on, and it doesn't like going together. oh well! This is overcome with super glue and patience. Ta-da! A lovely model when complete.
Then the drop.
No, it can't drop on a nice fluffy figures case tray that is lying nearby. Neither does it fall to the slightly less fluffy stack of magazines on the other side. Noooooooo. It falls directly into the Dremel case on the floor, bashing itself to pieces on drill bits and sundry drill attachments and other cruft.
I wince in pain. Mostly cuz I think I broke my toe falling down the stairs, but also because I recall that this model is tricky to put back together. I resolutely begin picking up the pieces and reach for my super glue.
To add insult to injury, after I recover the bits and begin ever so patiently applying super glue to the little bits needed to put the pillars for the ammo box back into place - I drop the main bit. Off it goes into the black hole that is the floor of my dungeon, never to be seen again.
That's the "hate" part. I hate dropping models when they are nearly complete. Considering I slipped and fell down my stairs (caught myself, but hit a few!) this morning, I guess I should just have called it a day for anything requiring concentration.
The love part comes now, so sit back, relax and sip your whine! :-)
"Green Stuff" is your friend.
After searching for twenty minutes or longer, and basically cleaning the floor with my hands, I settled down to work with "Green Stuff", or two part modeling clay. It's also known as Kneadatite Epoxy Modeling Putty.
Take a bit of blue and a bit of the yellow portions and mash them together, like making a mud pie as a child. Keep water nearby and a sculpting tool of some sort. Although an X-Acto knife will work, there are hazards involved, especially if you're clumsy like me!
After mushing the yellow and blue bits together, as any child can tell you, you have green mush! The resultant mix is somewhat sticky - which allows you to stick it onto models where it is needed. However, that stickiness can also work against you. This is where the water comes in. Wet your fingers (the ones you are touching the green stuff with!) to keep it from sticking to them. Also, dip your sculpting tool in water to allow it to slide across the surface of the putty.
Apply the green stuff to the spot you need to fix, massage it gently with your fingers and sculpting tool. If you have a tricky thing (like the brace for an ammo box on a six pounder portee!), you may find that you need to form the green stuff as close as possible to the desired shape, and then come back later to trim off excess.
The image below was taken with my "Crackberry" phone, therefore the detail is not as clear as it should be; however, I hope you can see enough to get the point.

So remember folks, let's be careful out there!
I love my Battle Front Minis - they are usually very clean, well built, well considered models that go together without TOO much difficulty, and look really nice on the tabletop. The "Six-Pounder Portee" - a mid-war model of a British six pound anti-tank gun mounted on the back of a truck (Portee), is one that I have to say I'm a bit frustrated with.
Imagine the scene: less than a week till Fall In (the HMGS East convention in Gettysburg, PA), five different armies at two different scales scattered across the table in my chaoserrr war room, and I'm painting as fast as I possibly can.
I start the final coat, drybrushing and highlighting on my six pounder portees - and BAM! I drop one.
For starters, this model is a bit tricky to put together. Kudos to Battle Front for putting a "how to put it together" guide on their site for this model.
The problem lies with the ammunition rack on the back of the truck. There are four posts that this box is supposed to sit on, and it doesn't like going together. oh well! This is overcome with super glue and patience. Ta-da! A lovely model when complete.
Then the drop.
No, it can't drop on a nice fluffy figures case tray that is lying nearby. Neither does it fall to the slightly less fluffy stack of magazines on the other side. Noooooooo. It falls directly into the Dremel case on the floor, bashing itself to pieces on drill bits and sundry drill attachments and other cruft.
I wince in pain. Mostly cuz I think I broke my toe falling down the stairs, but also because I recall that this model is tricky to put back together. I resolutely begin picking up the pieces and reach for my super glue.
To add insult to injury, after I recover the bits and begin ever so patiently applying super glue to the little bits needed to put the pillars for the ammo box back into place - I drop the main bit. Off it goes into the black hole that is the floor of my dungeon, never to be seen again.
That's the "hate" part. I hate dropping models when they are nearly complete. Considering I slipped and fell down my stairs (caught myself, but hit a few!) this morning, I guess I should just have called it a day for anything requiring concentration.
The love part comes now, so sit back, relax and sip your whine! :-)
"Green Stuff" is your friend.
After searching for twenty minutes or longer, and basically cleaning the floor with my hands, I settled down to work with "Green Stuff", or two part modeling clay. It's also known as Kneadatite Epoxy Modeling Putty.
Take a bit of blue and a bit of the yellow portions and mash them together, like making a mud pie as a child. Keep water nearby and a sculpting tool of some sort. Although an X-Acto knife will work, there are hazards involved, especially if you're clumsy like me!
After mushing the yellow and blue bits together, as any child can tell you, you have green mush! The resultant mix is somewhat sticky - which allows you to stick it onto models where it is needed. However, that stickiness can also work against you. This is where the water comes in. Wet your fingers (the ones you are touching the green stuff with!) to keep it from sticking to them. Also, dip your sculpting tool in water to allow it to slide across the surface of the putty.
Apply the green stuff to the spot you need to fix, massage it gently with your fingers and sculpting tool. If you have a tricky thing (like the brace for an ammo box on a six pounder portee!), you may find that you need to form the green stuff as close as possible to the desired shape, and then come back later to trim off excess.
The image below was taken with my "Crackberry" phone, therefore the detail is not as clear as it should be; however, I hope you can see enough to get the point.

So remember folks, let's be careful out there!
Wednesday, October 28, 2009
LRDG Battle Report over at "What Would Patton Do? Blog
I don't mean to drive any of our loyal readers away; however, one of our wargaming associates has posted a truly unique "batrep" of his Long Range Desert Group's first battle. Head over to "What Would Patton Do?" blog and read "L Patrol pt 1."
Fall-In Preparations
In the dark shadows of the nether regions of the Castle Keith, I am laboring intently, deep in the dank dungeon that is my War Room.
I am currently working on some additional troops for my 28mm World War II (Disposable Heroes, a Coffin for Seven Brothers - DHC7B) German SS and American Paratroopers, because I intend on running a "pick up game" at Fall-In. The scenario is called "Blood in the Snow". It is a meeting engagement between elite forces at a remote farm manor house during the Bastogne encirclement.
I'm also working on British WWII tanks (Honeys and Crusaders) and infantry for my 15mm Flames of War army. I'm applying paint to my Italian tanks, infantry, and artillery, trying to top off that army too!
Just to confuse matters, since I obviously don't have enough to paint, I'm working on my Late War Gross Deutschland Panzer Kompanie. Basically I'm herding cats, but thankfully the Pioneers are helping! ;-)
If that isn't enough, I'm also touching up various bits and bobs to sell at the Saturday morning Flea Market. I'll also be bringing, by special request, a small package of very special fleas! Can't get enough of those!
If any of our loyal readers are headed to Fall-In, look for us at a gaming table covered with snow, or sand, or grass, or...
I am currently working on some additional troops for my 28mm World War II (Disposable Heroes, a Coffin for Seven Brothers - DHC7B) German SS and American Paratroopers, because I intend on running a "pick up game" at Fall-In. The scenario is called "Blood in the Snow". It is a meeting engagement between elite forces at a remote farm manor house during the Bastogne encirclement.
I'm also working on British WWII tanks (Honeys and Crusaders) and infantry for my 15mm Flames of War army. I'm applying paint to my Italian tanks, infantry, and artillery, trying to top off that army too!
Just to confuse matters, since I obviously don't have enough to paint, I'm working on my Late War Gross Deutschland Panzer Kompanie. Basically I'm herding cats, but thankfully the Pioneers are helping! ;-)
If that isn't enough, I'm also touching up various bits and bobs to sell at the Saturday morning Flea Market. I'll also be bringing, by special request, a small package of very special fleas! Can't get enough of those!
If any of our loyal readers are headed to Fall-In, look for us at a gaming table covered with snow, or sand, or grass, or...
Tuesday, July 14, 2009
U.S. Army Enters the Mediterranean!
Bwana Bill and I have been discussing getting back into Flames of War (FoW) for some time now, so we put lead on the table and made it happen!
Bwana is used to playing his Deutsch Afrika Korp (DAK); however, for our return to the desert after nearly three years, Bwana ran the game and assisted his son in playing, while running his all new, fresh off the table U.S. Army Tank Company!
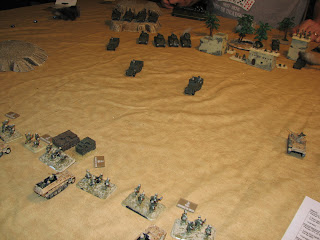

Two platoons of Sherman tanks, an infantry platoon, a Company Command platoon in Sherman tanks, and a platoon of tank hunters - M-10 tank destroyers made up the U.S. Tank Company.
On the German side were the following platoons; Company Command in Panzer Mk IVs (x2), two platoons of Panzer III (with the long barreled 50cm gun - 3 shots per turn if they don't move!) and a platoon of armored Panzergrenadiers.
This appears to represent two fairly evenly matched opposing teams; however, there are benefits and detractors each opponent had to deal with.
After a rousing rehash of the rules (did I fail to mention that it's been nearly three years since we've played FoW?) we placed our units on the table and prepared to duel.
On the first turn, due to the special rules of the scenario we were playing, our units had effectively moved - so could only shoot at reduced rate of fire.
The Germans started the game; my first time running DAK, so I was anxious about my ability to run the army properly. However, this was offset by the fact that Bwana Bill and his son had not fielded an 'Ami' army before!
I rolled to dig in my infantry on one objective - and failed. Since they didn't move or shoot, they were considered concealed and gone to ground.
A few shots at long range from the 50cm guns and the 75s of the Panzer platoons and the Company Command team resulted in one American tank bailed out, one in flames and the 2IC tank(the Executive Officer or 2nd in command)in flames.

First blood to the DAK veterans!

American 2IC tank in flames
On their turn, the Americans chose to move closer to the Panzers with one tank platoon, and wisely elected to place their surviving Company Command tank behind a building. A leaderless company usually results in an epic fail!
Maneuvering deftly up a wadi, the Americans closed the distance and opened fire on the Panzers. The results were one Panzer III bailed and one burning.
On the other half of the table, the M-10 Tank Destroyers also closed the range and fired into the flank of the first DAK Panzer platoon, bailing one and killing another.
The American infantry moved out of their vehicles into buildings on their side of the table and consolidated their positions.
Turn two:
I rolled to dig in my infantry on one objective - and failed.
Having forgotten my Stormtrooper move at the end of my turn, I decided to stay where I was and slug it out with the Sherman tanks. 2nd platoon of Panzers opened fire on the Shermans at range, killing two.
1st platoon lit up the second Sherman platoon, killing two tanks, and also took a "just for kicks" shot at an American halftrack in the open, missing miserably.
I succeeded in remembering my Stormtrooper move, and rolled successfully for two platoons to move, and moved them four inches - one towards the enemy, one away.
The Americans moved their 1st tank platoon towards the objective guarded by the DAK Panzergrenadieres. The half tracks, free of troops but armed with machine guns, moved towards the hapless infantry this turn as well.
The survivors of the American 2nd tank platoon fired on the Panzer IVs of the Company Command team - knocking out the German 2IC. The American Commander, peeking out from behind the building fired his rounds into the panzers, with little effect.
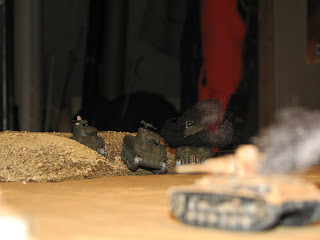
The Americans maneuver aggressively
The M-10s, now in range, fired at long range, and knocked out a Panzer III of 2nd platoon, on the German left flank. Between the M-10s and the survivors of the American 1st tank platoon, the German 2nd Panzer platoon lost another tank, and two more bailed.
Turn three:
I rolled to dig in my infantry on one objective - and failed.
I rolled to get my tank crews that were bailed out back into their vehicles. One failed. The other crew jumped in and prepared to resume the battle.
Since the Americans were now in range of the "doorknocker" 37mm gun on the infantry command half track, it fired two rounds - hitting once, and true to form, the shot bounced off.
Did I mention my infantry failed to dig in, on three tries???
2nd Panzer Platoon fired at the American 1st platoon, killing another tank and bailing one other, leaving only the platoon command tank fully operational.
1st Platoon and the Company Commander chose to shoot at the survivors of the American 2nd tank platoon, and destroyed it nicely. One unit dead!
The Americans rolled to get their tank crews back in the fight, and succeeded.
The Americans returned fire from the M-10s, bailing three of the remaining Panzers in 1st Panzer platoon, and killing one.
1st Tank platoon charged up to the (not) dug in Panzergrenadiers, alongside four half tracks. The armored juggernaut lashed out with machine gun fire, pinning the infantry thus reducing their "defensive fire" to one shot per section, vice the normal three shots. The German defensive fire managed to knock out one American half track.
After killing one section with the MG fire, and nicely pinning them, the tanks and tracks charged into assault. They rolled, I rolled, they rolled, and the infantry was dead. Poor guys never had a chance against tanks, all unsupported like that! However, the German half tracks remained on the objective, thus contesting it.
Turn four:
I rolled to dig in my infantry on one objective - and failed. Oops - hehehe! Never mind, they were dead at this point.
At this point I march moved the Company Commander towards an unguarded American objective. He closed to about eight inches.
On the American turn, Bwana Bill and son attempted to consolidate their position on the German objective by killing all the remaining tracks. They accomplished this without too much trouble - half tracks against tanks aren't much of a match! With those tanks and half tracks on my objective, I needed to pry them off or get a vehicle there to contest it, before the start of their next turn.
The American Commander made a run for the objective, which was about to be contested by the German Commander, and fired a shot at the German Command tank, but missed. Nearly an epic fail; however, he now contested the objective, and on my turn I would need to blast him off the objective to win it, and perhaps the game.
The M-10s fired at the German 2nd tank platoon, managing to bail three tanks - leaving the platoon combat ineffective.
Turn five:
I rolled to get my three bailed crews back into their vehicles, succeeding on two, but the third crew were certain their vehicle was about to brew up, and stayed cowering beside it. Rommel would have been able to inspire them - Rommel I'm not!
The Panzer IV Company Command tank fired at full Rate of Fire (RoF) at the American company commander, penetrating his armor and cooking off his ammo. A leaderless company is not a good thing.
I charged one tank of 2nd tank platoon up onto the recently captured objective, placing its barrel almost onto the rear of one of the surviving American tanks. The remainder of the platoon (the ones that were in the battle!) and 1st tank platoon then opened fire on the Sherman tanks and the two half tracks. Results, all in flames - you gotta love those long barreled 50cm guns, firing 3 rounds each! I do recall the many games when my Brits were on the receiving end of that fusillade, and it is unpleasant seeing that many die rolled against your vehicles!
At the bottom of turn five, I rolled for Stormtrooper moves for each of my units, and all three got it. I moved closer to the objective to insure the Americans wouldn't attempt to retake it with the M-10s, and eased the Company Command tank up next to the burning American CO's tank.
At this point I controlled one objective, and the Americans were without their CO.
As Bwana Bill and his son began their turn, they realized they needed to take a morale check; however, without a CO, there is no morale check. Game, set, and match.
A win for the doomed DAK, and a good first mission for the fresh faced Americans!
Bwana is used to playing his Deutsch Afrika Korp (DAK); however, for our return to the desert after nearly three years, Bwana ran the game and assisted his son in playing, while running his all new, fresh off the table U.S. Army Tank Company!

Two platoons of Sherman tanks, an infantry platoon, a Company Command platoon in Sherman tanks, and a platoon of tank hunters - M-10 tank destroyers made up the U.S. Tank Company.
On the German side were the following platoons; Company Command in Panzer Mk IVs (x2), two platoons of Panzer III (with the long barreled 50cm gun - 3 shots per turn if they don't move!) and a platoon of armored Panzergrenadiers.
This appears to represent two fairly evenly matched opposing teams; however, there are benefits and detractors each opponent had to deal with.
After a rousing rehash of the rules (did I fail to mention that it's been nearly three years since we've played FoW?) we placed our units on the table and prepared to duel.
On the first turn, due to the special rules of the scenario we were playing, our units had effectively moved - so could only shoot at reduced rate of fire.
The Germans started the game; my first time running DAK, so I was anxious about my ability to run the army properly. However, this was offset by the fact that Bwana Bill and his son had not fielded an 'Ami' army before!
I rolled to dig in my infantry on one objective - and failed. Since they didn't move or shoot, they were considered concealed and gone to ground.
A few shots at long range from the 50cm guns and the 75s of the Panzer platoons and the Company Command team resulted in one American tank bailed out, one in flames and the 2IC tank(the Executive Officer or 2nd in command)in flames.

First blood to the DAK veterans!

American 2IC tank in flames
On their turn, the Americans chose to move closer to the Panzers with one tank platoon, and wisely elected to place their surviving Company Command tank behind a building. A leaderless company usually results in an epic fail!
Maneuvering deftly up a wadi, the Americans closed the distance and opened fire on the Panzers. The results were one Panzer III bailed and one burning.
On the other half of the table, the M-10 Tank Destroyers also closed the range and fired into the flank of the first DAK Panzer platoon, bailing one and killing another.
The American infantry moved out of their vehicles into buildings on their side of the table and consolidated their positions.
Turn two:
I rolled to dig in my infantry on one objective - and failed.
Having forgotten my Stormtrooper move at the end of my turn, I decided to stay where I was and slug it out with the Sherman tanks. 2nd platoon of Panzers opened fire on the Shermans at range, killing two.
1st platoon lit up the second Sherman platoon, killing two tanks, and also took a "just for kicks" shot at an American halftrack in the open, missing miserably.
I succeeded in remembering my Stormtrooper move, and rolled successfully for two platoons to move, and moved them four inches - one towards the enemy, one away.
The Americans moved their 1st tank platoon towards the objective guarded by the DAK Panzergrenadieres. The half tracks, free of troops but armed with machine guns, moved towards the hapless infantry this turn as well.
The survivors of the American 2nd tank platoon fired on the Panzer IVs of the Company Command team - knocking out the German 2IC. The American Commander, peeking out from behind the building fired his rounds into the panzers, with little effect.

The Americans maneuver aggressively
The M-10s, now in range, fired at long range, and knocked out a Panzer III of 2nd platoon, on the German left flank. Between the M-10s and the survivors of the American 1st tank platoon, the German 2nd Panzer platoon lost another tank, and two more bailed.
Turn three:
I rolled to dig in my infantry on one objective - and failed.
I rolled to get my tank crews that were bailed out back into their vehicles. One failed. The other crew jumped in and prepared to resume the battle.
Since the Americans were now in range of the "doorknocker" 37mm gun on the infantry command half track, it fired two rounds - hitting once, and true to form, the shot bounced off.
Did I mention my infantry failed to dig in, on three tries???
2nd Panzer Platoon fired at the American 1st platoon, killing another tank and bailing one other, leaving only the platoon command tank fully operational.
1st Platoon and the Company Commander chose to shoot at the survivors of the American 2nd tank platoon, and destroyed it nicely. One unit dead!
The Americans rolled to get their tank crews back in the fight, and succeeded.
The Americans returned fire from the M-10s, bailing three of the remaining Panzers in 1st Panzer platoon, and killing one.
1st Tank platoon charged up to the (not) dug in Panzergrenadiers, alongside four half tracks. The armored juggernaut lashed out with machine gun fire, pinning the infantry thus reducing their "defensive fire" to one shot per section, vice the normal three shots. The German defensive fire managed to knock out one American half track.
After killing one section with the MG fire, and nicely pinning them, the tanks and tracks charged into assault. They rolled, I rolled, they rolled, and the infantry was dead. Poor guys never had a chance against tanks, all unsupported like that! However, the German half tracks remained on the objective, thus contesting it.
Turn four:
I rolled to dig in my infantry on one objective - and failed. Oops - hehehe! Never mind, they were dead at this point.
At this point I march moved the Company Commander towards an unguarded American objective. He closed to about eight inches.
On the American turn, Bwana Bill and son attempted to consolidate their position on the German objective by killing all the remaining tracks. They accomplished this without too much trouble - half tracks against tanks aren't much of a match! With those tanks and half tracks on my objective, I needed to pry them off or get a vehicle there to contest it, before the start of their next turn.
The American Commander made a run for the objective, which was about to be contested by the German Commander, and fired a shot at the German Command tank, but missed. Nearly an epic fail; however, he now contested the objective, and on my turn I would need to blast him off the objective to win it, and perhaps the game.
The M-10s fired at the German 2nd tank platoon, managing to bail three tanks - leaving the platoon combat ineffective.
Turn five:
I rolled to get my three bailed crews back into their vehicles, succeeding on two, but the third crew were certain their vehicle was about to brew up, and stayed cowering beside it. Rommel would have been able to inspire them - Rommel I'm not!
The Panzer IV Company Command tank fired at full Rate of Fire (RoF) at the American company commander, penetrating his armor and cooking off his ammo. A leaderless company is not a good thing.
I charged one tank of 2nd tank platoon up onto the recently captured objective, placing its barrel almost onto the rear of one of the surviving American tanks. The remainder of the platoon (the ones that were in the battle!) and 1st tank platoon then opened fire on the Sherman tanks and the two half tracks. Results, all in flames - you gotta love those long barreled 50cm guns, firing 3 rounds each! I do recall the many games when my Brits were on the receiving end of that fusillade, and it is unpleasant seeing that many die rolled against your vehicles!
At the bottom of turn five, I rolled for Stormtrooper moves for each of my units, and all three got it. I moved closer to the objective to insure the Americans wouldn't attempt to retake it with the M-10s, and eased the Company Command tank up next to the burning American CO's tank.
At this point I controlled one objective, and the Americans were without their CO.
As Bwana Bill and his son began their turn, they realized they needed to take a morale check; however, without a CO, there is no morale check. Game, set, and match.
A win for the doomed DAK, and a good first mission for the fresh faced Americans!
Saturday, July 11, 2009
Assembling the Sturer Emil
 Well, I'm excited as I bought my Mid War Monster so I thought you might like to see the contents of the box and how the models look after assembly.
 First, the miniatures come in a nice box. Note that Sturer Emils are 3 per box at $30.00. That's $10.00 each. For those quick to do the comparison, these are CHEAPER than "normal" Battlefront Flames of War tanks!

On the back of the box they list all of the models in the series.
 Packed by Noriey. Let's see how well Noriey can pack!
Looks like Noriey can pack in it!
 It's all there! Note that after I took the shot, I found the sixth crewmember. He was squeezed in between some tracks!
Here is a close-up of the resin. Notice how "clean" it is. The entire resin model is like that. Very clean castings.
Now it's time to clean up some of metal parts and assemble the models. Only minimal cleaning 

was required. The metal tracks fit to the body perfectly. The inside of the separate gun barrel that fit against the body required some cleaning out to fit properly, but not much.
I then glued the crew to a tounge depressor as I like to paint 15mm individual figures in this manner.
Here are some closeups of one of the assembled models. 


Sunday, November 19, 2006
Fall-In - The Battle at Sidi Rezegh
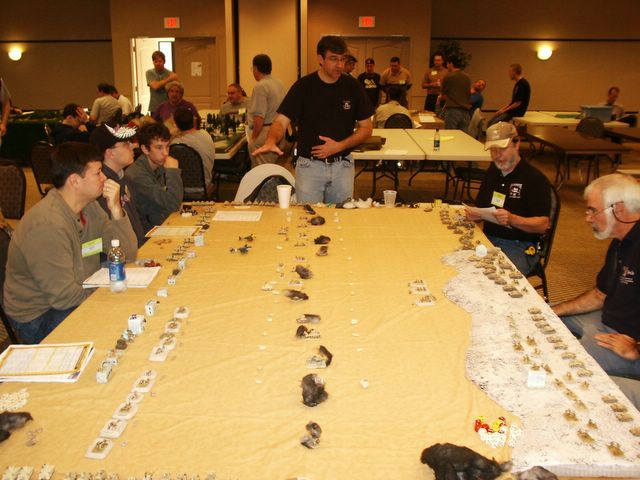
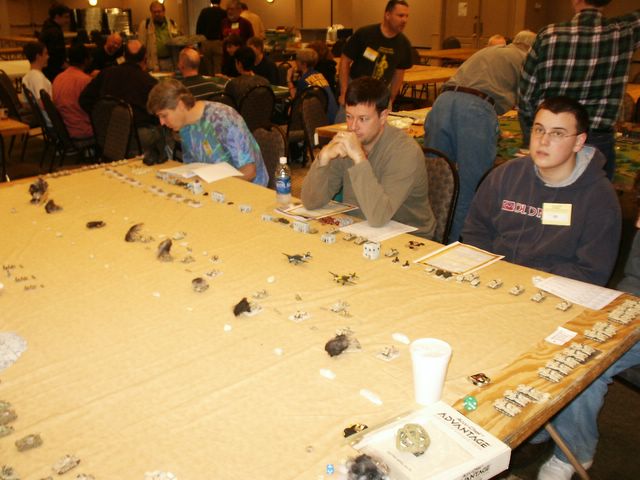
Bwana Bill and I ran the Sidi Rezegh scenario on Saturday morning at Gettysburg during the Fall-In convention.
The game went according to history - which shows that even with a point's based gaming system, a historical outcome can be achieved.
Before the game began I briefed the forces - both British and German - on the way the battle went, how it was won, how it was lost.
After the overall briefing I lent a few words of advice to the British side, since I had played the Brits and lost only once in all of our test matches. In that one loss, I forgot to stick to my plan, and I did as the British forces of 1941 did - and indeed as our players on the British side did as well!
Not to say they played poorly! On the British side were three fairly new players, somewhat inexperienced. In addition, telling someone to 'wait' to build up their forces when turn after turn they fail to roll for reinforcements is hard. All that time waiting and the Germans and Italians are marching across the table - you have to do something!
Unfortunately, that need or desire to "do something" led to the British forces trickling into combat a little at a time, with their combat power greatly reduced.
The German 21st Panzer Regiment accomplished their mission of taking the critical airfield at Sidi Rezegh back from the dowdy Brits.
The New Zealanders managed to hold their flank, and had the game not ended on turn 6, the Germans would have turned their attention to the hold-outs near the barracks of the airfield. It would only have been a matter of time.
All in all it was a good game and I hope that the players had fun.
I know Bwana Bill and I are pretty burned out with Flames of War at the moment, as we have played this particular scenario to death - and we both played in a tourney on Friday at Fall-In that lasted until quite late in the evening.
Still, we love the game - but don't expect to read about FoW for a while as we dust off some other games we've neglected in the run up to Fall-In!
The game went according to history - which shows that even with a point's based gaming system, a historical outcome can be achieved.
Before the game began I briefed the forces - both British and German - on the way the battle went, how it was won, how it was lost.
After the overall briefing I lent a few words of advice to the British side, since I had played the Brits and lost only once in all of our test matches. In that one loss, I forgot to stick to my plan, and I did as the British forces of 1941 did - and indeed as our players on the British side did as well!
Not to say they played poorly! On the British side were three fairly new players, somewhat inexperienced. In addition, telling someone to 'wait' to build up their forces when turn after turn they fail to roll for reinforcements is hard. All that time waiting and the Germans and Italians are marching across the table - you have to do something!
Unfortunately, that need or desire to "do something" led to the British forces trickling into combat a little at a time, with their combat power greatly reduced.
The German 21st Panzer Regiment accomplished their mission of taking the critical airfield at Sidi Rezegh back from the dowdy Brits.
The New Zealanders managed to hold their flank, and had the game not ended on turn 6, the Germans would have turned their attention to the hold-outs near the barracks of the airfield. It would only have been a matter of time.
All in all it was a good game and I hope that the players had fun.
I know Bwana Bill and I are pretty burned out with Flames of War at the moment, as we have played this particular scenario to death - and we both played in a tourney on Friday at Fall-In that lasted until quite late in the evening.
Still, we love the game - but don't expect to read about FoW for a while as we dust off some other games we've neglected in the run up to Fall-In!
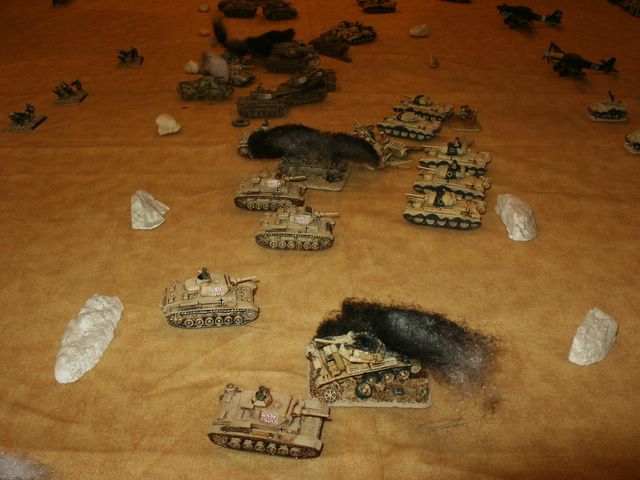
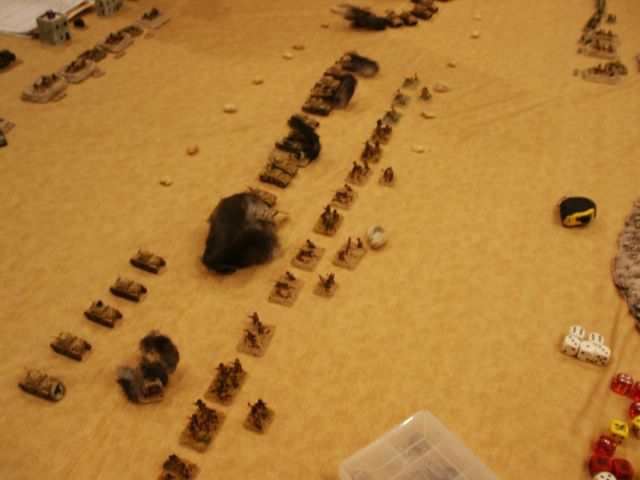

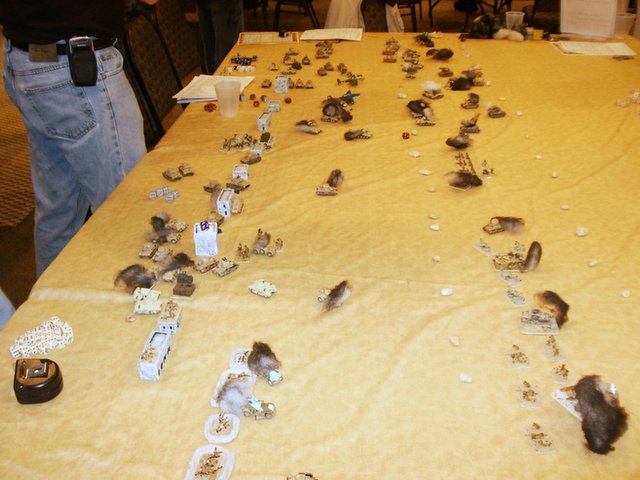
The Aftermath
The defeated British tankers discuss tactical errors with Keith. The New Zealanders held against the Italians, however the undefeated weight of the DAK was about to fall on their depleted forces.


Monday, October 16, 2006
More Flames of War Action at Game Parlor Woodbridge
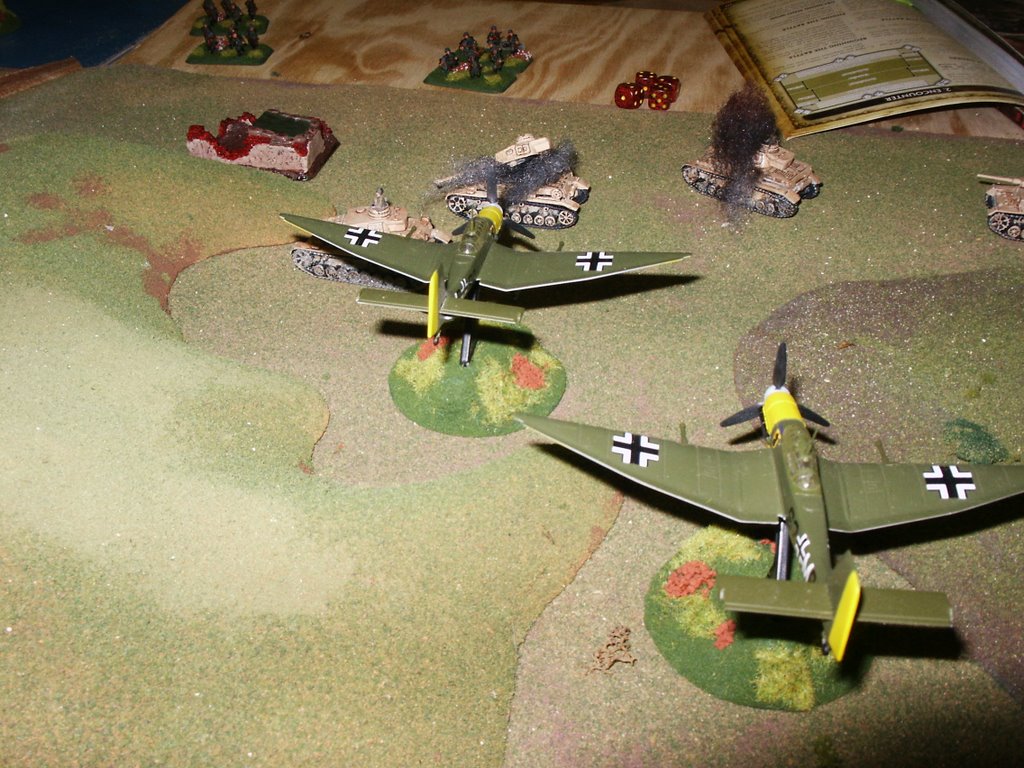
Here you can see the culmination of my second game of the tournament. I was up against German panzergrenadier company. This was a non-lethal field exercise of course. I concentrated my attack on the right flank pushing through an infantry platoon in the woods. Of course I had to run the risk of having some of my tanks get bogged down. For three turns I managed to avoid rolling any "1s." Once I finished pushing the infantry out of the way I was free to swing toward the center and contest an objective. My opponent was not able to move a unit close enough to challenge this so he tried to blow me off the objective with Stukas. In the picture you can see that he did in fact manage to get a couple of them but this was not enough to cause a morale check. If you look underneath the left wing of the lead Stuka you can see my company commander's tank still within four inches of the objective. Game over!
Wednesday, October 11, 2006
More Flames of War Action at Game Parlor Woodbridge


In the top photo you can see where the Amerikaners are closing in on me. There are 3 M5 Stuarts that zoomed around my left flank and shot up my side armor. At the top-right of the photo you can see a US infantry platoon reoccupying the village and at the same time threatening my right flank.
In the bottom photo you can see where I have wiped out the Stuarts but they have already done their job of causing me irreparable harm. I am also trying to get my 88s in a position on the crest of the hill where they can hopefully finally help me out, but they never succeeded. I found that using 88s to support a very mobile attacking force is not the best choice if there are going to be a lot of hills. It's too hard to get them into position. Next time I might try some artillery instead. We'll see.
I really got picked apart pretty bad in this game. The worst part was that my opponent was still a beginner and I was explaining game mechanics to him throughout, and all the while he was picking my bones clean! How does a thing like that happen? We'll I think that game mechanics aside, Kyle had a really good "nose" for tactics. It figures, in real life he's an Army officer on the staff of the Army War College in Carlisle, PA! So, no shame in losing to him then, right? I'm just glad that he is on our side!
Monday, October 09, 2006
More from the Flames of War Tournament at Woodbridge
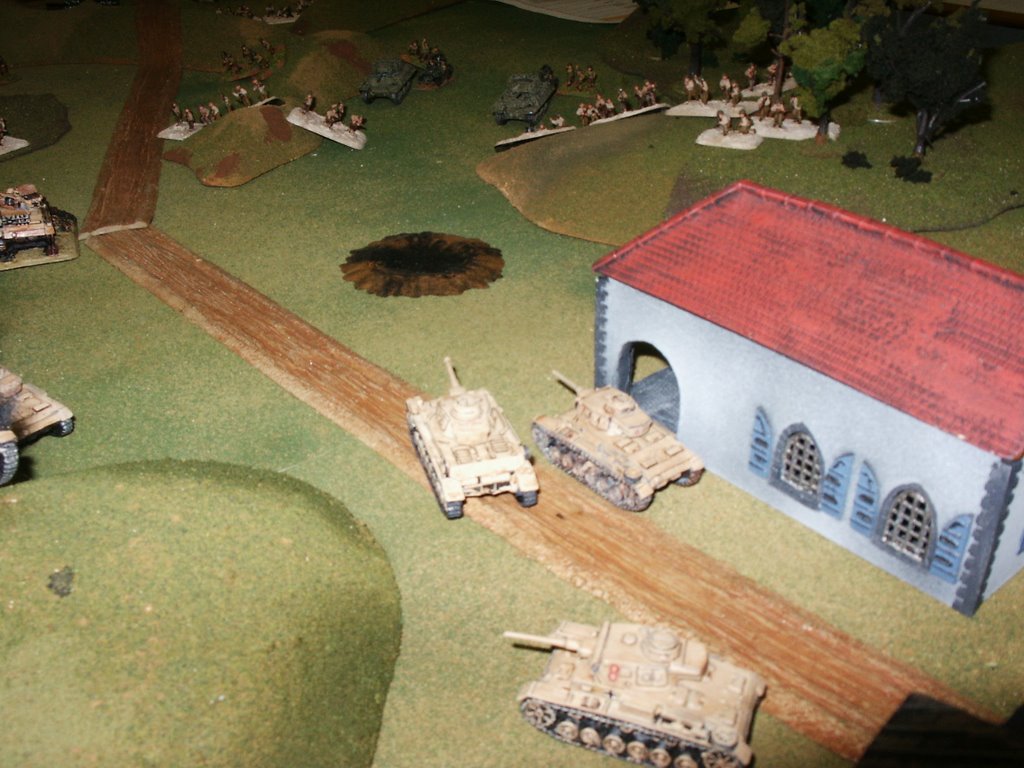
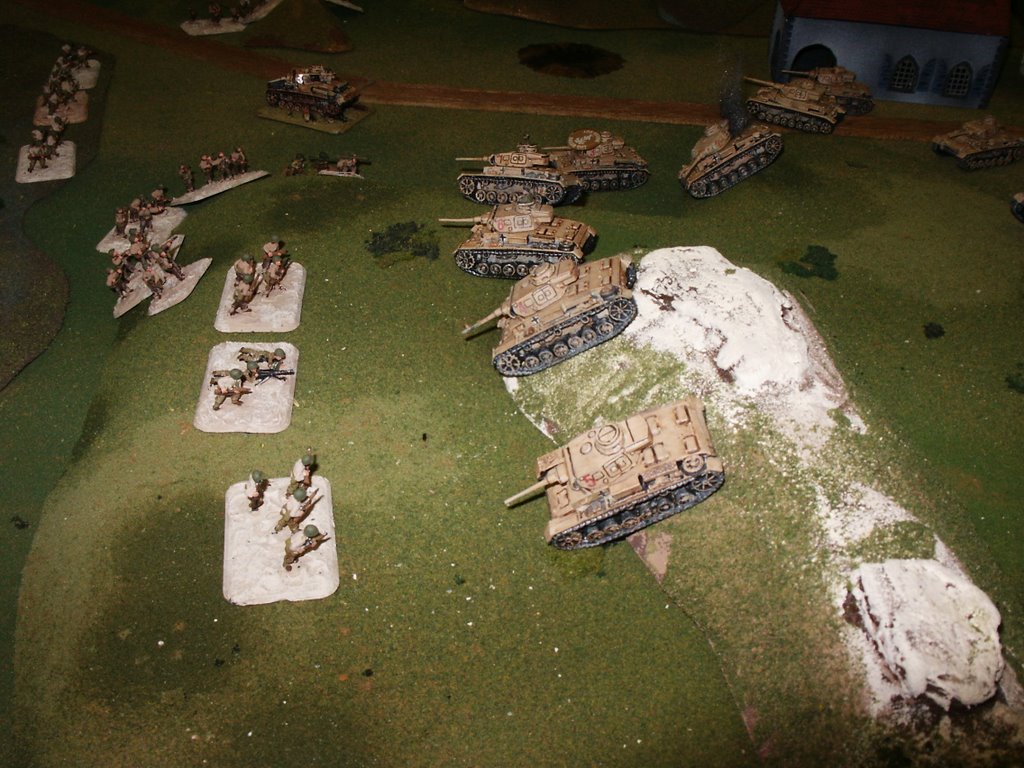
Here are some shots of my first game. I was up against a U.S. infantry company controlled by Kyle Burley. I moved out smartly and aggressively, just like the training exercises at Grafenwoehre Panzer Lehr school, and was looking forward to rolling over a whole bunch of infantry! And that is the way it started! My panzers rolled smartly into the little town in the center and up and over the big hill on the right flank. I wiped out the infantry platoon holding the hill. I thought I was doing really well, but those pesky bazookas and a couple of M10 tank destroyers lurking off to the right had made it a bit costly. But I wasn't too worried. I felt I could surely deal with these things and keep right on rolling West. Panzers Vorward! Well little did I know that I had already reached my "high tide." More on that later.
Subscribe to:
Posts (Atom)
